Monday, August 20, 2012

TWD -- Bland, bland, bland

Popovers, America's version of Yorkshire Pudding, are vastly overrated in my opinion. Perhaps we are now so used to big, mouth-watering muffins served up at every Starbucks and local cafe, or maybe our tastebuds are so sophisticated after two decades or more of the "food movement" where dishes are served with a plethora of herbs and spices that we no longer care much for bland.

Whatever the reason, I found popovers to have little to recommend them. Maybe I needed the roast beef and juices to get the authentic experience. But when you live in a hot, dry climate as the Midwest has been this summer, fixing a joint to go with the latest Baking with Julia adventure wasn't on my radar screen.

Since my husband and I are empty nesters and I didn't think I could even palm popovers over onto grandkids no matter how much jelly I slathered on them, I elected to halve the recipe and make a half dozen of them.

Popovers best attributes are that they are easy to make, don't call for expensive ingredients and their preparation doesn't dirty too many dishes. I elected to use my stick blender and it's accompanying tall cup to make them. It worked perfectly. Since I didn't have custard cups, I used a muffin pan, leaving empty every other cup allowing the dough plenty of room to expand.

After mixing up the flour, egg, salt, milk and butter, I popped them into the oven and awaited the results. The popovers rose beautifully, browned perhaps too quickly at 425 (I had to turn the oven down a bit), then dried out at the 350 temperature for 15 minutes.

The results? They looked like popovers although a bit too brown, but they tasted -- well, bland. The taste was similar to a cream puff, but without the cream. No fun in that! Would I make them again? Probably not, but the experience was worth the effort. Come winter when the winds are howling and a roast beef with its accompanying juices sounds inviting and I ask myself, "Should I make popovers to go with that?" I can safely answer myself with an unqualified "no."

Tuesday, July 31, 2012

TWD -- First a failure, then some tweaking

I confess. I didn't like this blueberry/nectarine pie in Baking with Julia. So, I made it twice, once following the recipe almost exactly, and then making adaptations which I felt improved it immensely.

My faults with the recipe were three: the crust recipe, the amount of thickener and the baking temperature. By following the recipe I was left with a non-flaky, very pale crust. I had to jack up the oven temperature to 450 degrees at the end, just to get the pie to brown. And, had I used only the 1 1/2 tablespoons of flour called for in the recipe, I would have been left with a runny mess. I hate pie fillings that run all over the plate, so on the first go-round I doubled the amount of flour. The pie (at left) looks pretty decent. But trust me, the crust was NOT flaky.

On the second time around, I used my favorite crust recipe (5 cups of pastry flour, 2 cups of Crisco or a combination of lard and Crisco, 1/2 tsp baking powder, 2 tsp. salt, 1 egg, 1 tbls. of vinegar and approximately 2/3 cup of ice water. I worked the fat into flour mixture with my hands, leaving some pretty big chunks of Crisco. I portion the picture into 6 ounce discs and freeze what I don't need immediately. This is the same pastry recipe used in the bakery for which I volunteer and it is a very popular way of making pie crust in Ohio. Look in any community cookbook from this area and you will find this crust recipe. A variation has been published in two of Marcia Adams' cookbooks (a Midwest cook) and the 200th Anniversary King Arthur cookbook. In my mind, it can't be beat. The egg helps the crust brown -- I hate a pale pie crust.

I also switched thickeners the second time around, going from flour to Clear Jel. I used four tablespoons of Clear Jel -- my new go-to thickener for pies. I used to use tapioca, but Clear Jel is even better.

And, I upped the baking temperature to 400 degrees. This, too, helped the pie brown.

I'm not sure after making this pie twice that cooking part of the filling on top of the stove helps in the overall flavor. Since I make a lot of pies and taste a lot of pies at the bakery, I can't say that this method improves upon the end result. Plus, it's an added step that takes time and dirties a saucepan.

So, here is a picture of Pie No. 2 with the all-Crisco, pastry flour, vinegar and egg crust; Clear Jel; and a baking temperature of 400 degrees. As soon as I put a fork in the pie, I could tell a huge difference in the crust. The pastry all but melted in your mouth. Would I make this pie again -- yes, but with the adaptations mentioned above. And, I would substitute peaches for the nectarines -- I think they offer up more flavor.

Tuesday, July 17, 2012

TWD--Semolina Bread

I was in my element with the latest Tuesdays with Dorie assignment: Semolina Bread. Although I have used semolina in pasta and pizza crust, I have never actually made a loaf of bread with the flour.

The instructions were clear, but anyone not used to making bread may have been put off with the loose and wet dough. It's tempting to keep adding flour, but I resisted, thinking that the wet dough would make a superior loaf.

I chose to bake my bread in a La Cloche. Being a "bread head," (I confess I currently have 14 kinds of flour on my shelves) I have a lot of equipment, and I often use the stone La Cloche baker for making French bread-like loafs. I recalled that Rose Levy Beranbaum recommended the La Cloche for her semolina loaf, so I looked up her recipe in "The Bread Bible" and, sure enough, it was very much like the one in "Baking with Julia." I let the bread rise in the La Cloche bottom, while I preheated the lid while preheating the oven. I then clamped the lid on the La Cloche just before putting the bread in the oven. With a La Cloche, there is no need to produce steam in the oven by dumping water or ice cubes in a preheated pan. The baker keeps the moisture in the bread from evaporating. I removed the lid after the first 15 mintues to allow the crust to develop.

I served the loaf at a Fourth of July get-together. Although no one commented on it, I thought it was good with a distinctive "buttery" taste. I froze the rest of the loaf and intend to make garlic bread with the remainder.

Tuesday, July 3, 2012

TWD -- Hazelnut aka almond biscotti

Hazelnut, aka almond biscotti, was a fairly simple assignment for Tuesdays with Dorie. If you live in a town of 6,000 people and the nearest big market is more than 30 miles away, you have to find something to substitute for hazelnuts. I chose almonds after "googling" hazelnut substitute. I roasted the almonds for 15 minues at 350 degrees, then chopped them with a knife, rather than use a nut chopper. I wanted big chunks of almonds, not miniscule pieces.

From there on out, I followed the recipe to a T, even going so far as to measure the length of my biscotti "logs" with a ruler.

What I learned from this recipe is to bake the biscotti on a cooling rack for the second baking. That way you don't have to flip each cookie halfway through. What a concept! I loved it.

The biscotti turned out perfectly after 10 minutes in the oven at 300 degrees.. I hate jaw-breaking biscotti that one needs to keep the dentist's phone number nearby when taking the first bite. This biscotti was pretty crunchy (there was no fat in the recipe which tends to make it softer), but it wasn't so hard one had to fear an impending dental crown. One thing that might have made the recipe better was a half teaspoon of almond extract to boost the almond taste a bit. I added brandy and vanilla, but I found I couldn't taste either in the final product. But, all in all, the taste was good, perfect with a morning cup of coffee!

Tuesday, June 19, 2012

TWD: Genoise -- the French can have it!


Put me in the failure column for this week's Tuesdays with Dorie. My French strawberry cake would turn anyone off genoise. I have successfully made sponge cake and jelly roll cakes in the past, but genoise was a new experience. Unfortunately, my cake bottom was tough enough to use as paving material. Notice the lighter bottom half in the picture at right. That was the tough and doughy portion.

Rather than cut the 8-inch cake in thirds, put strawberries and whipped cream between the layers, then frost the cake with whipped cream, I elected to cut my cake into rounds using a 3-inch biscuit cutter hoping to salvage at least part of the cake.

I followed the instructions to a T, whipping the mixture until I got the prescribed ribbon of batter. I believe I folded the flour in adequately. Although the bump in the bowl of my Kitchen Aid mixture did hide pockets of flour, I folded and folded until I felt I got all the flour incorporated. I then carefully folded in the butter and a portion of the batter mixture, but to no avail. The cake, particularly the shoe-leather bottom layer, looked inedible.

Soldiering on, I divided my rounds in half, layered each half with strawberries and whipped cream, and tried to soak enough juice into the intractable bottom layer to make it edible. It didn't work. The bottom layer was so rubbery, the strawberry syrup rolled off like water off a duck's back. My husband and I ate the top half of the cakes and put the bottom half down the disposal. I will be very interested to see how others fared with this recipe. Although I was only able to eat the top portion of the cake, I learned that I much prefer the southern version of strawberry shortcake, using warm biscuit-like rounds made with White Lily self-rising flour, lard, buttermilk and sugar. I will concede the genoise version to the French and stick to my tried-and-true shortcake.

Tuesday, June 5, 2012

TWD--Oasis Naan

The Oasis Naan, the latest Tuesdays with Dorie assignment, was not at all what I expected. I have tasted naan once at an Indian restaurant, and I remembered it as being much like an Arabic flatbread; not puffy but relatively flat.

When I read through the ingredients I realized this was basically the formula for French bread. And mine ended up tasting like French bread and looking like French bread once it was cut.

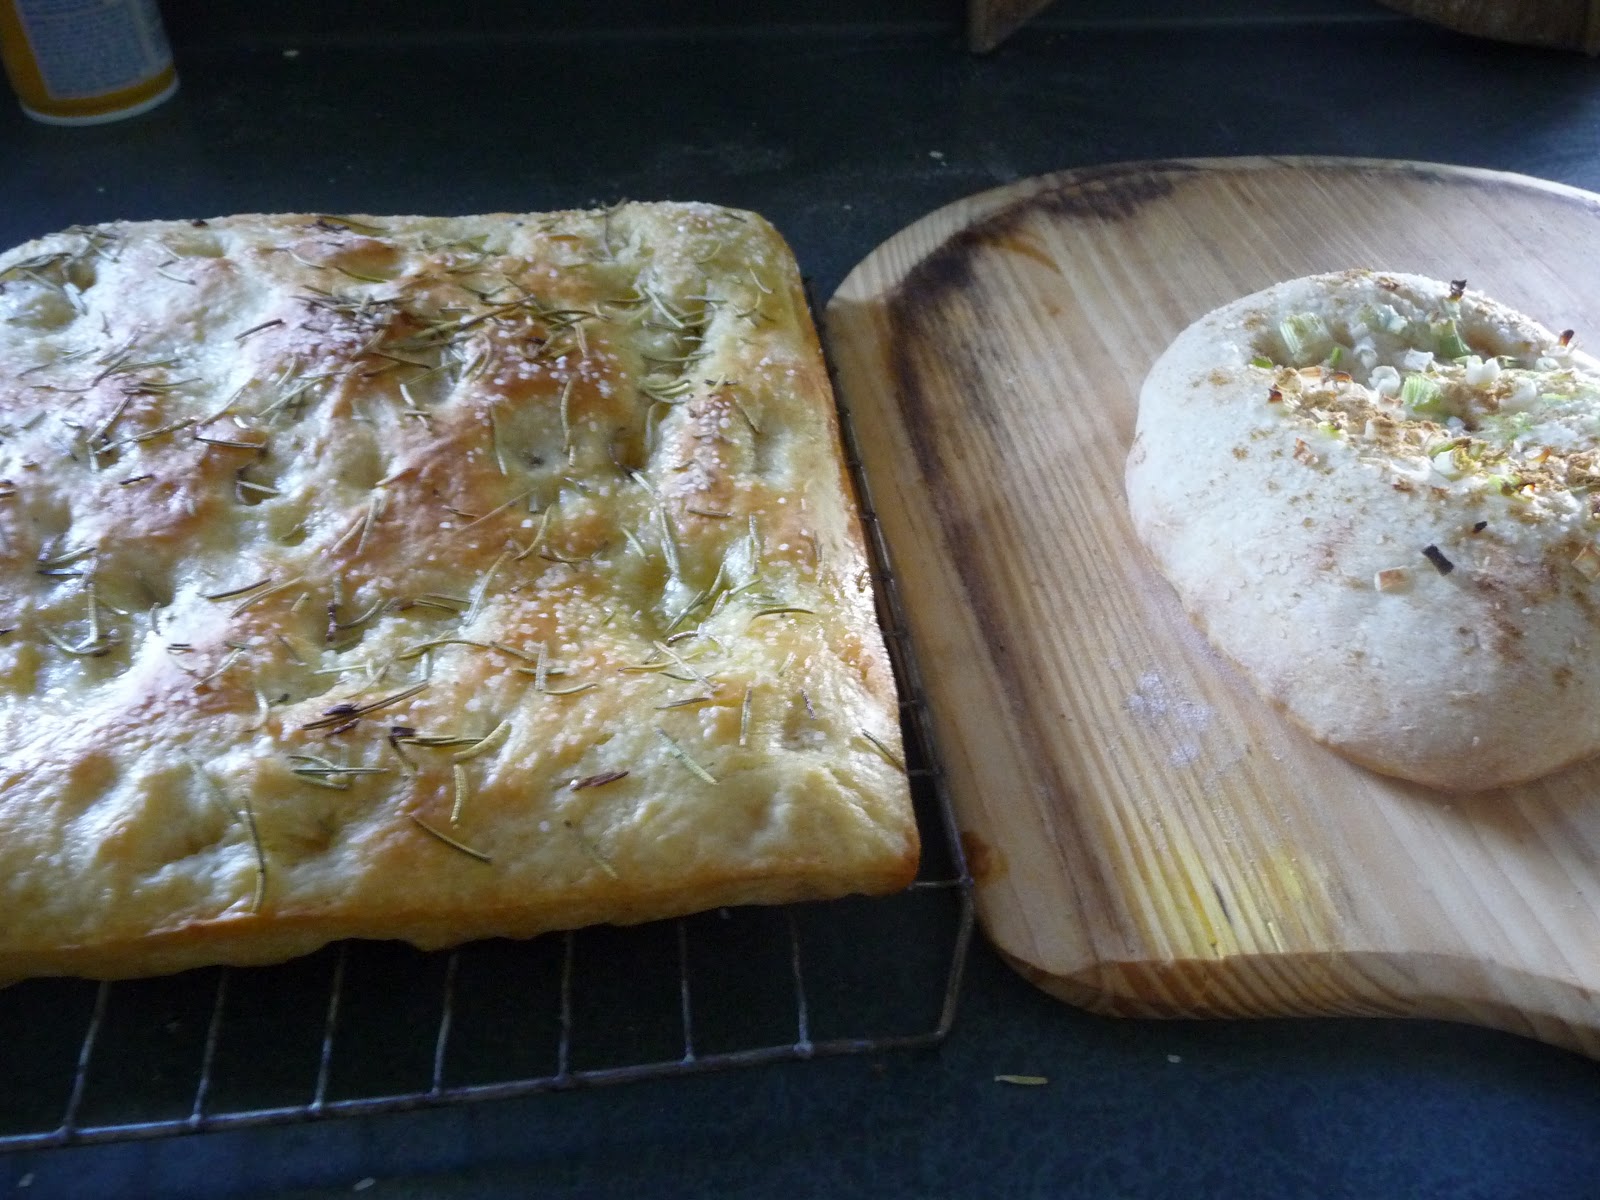
I decided early on to cut the recipe in half, make one naan round and use the rest of the dough for focaccia. The dough was somewhat slack, so I folded it after one hour to help give it structure.

 I portioned the half recipe into fourths, patted one fourth into the five- to six-inch round, then poked away at the dough with the round end of my wire whisk. I wet the dough, added chopped scallion and cumin.

After baking the round for about five to six minutes at 500 degrees, I was surprised to see a puffy end product. After letting it cool, I sliced it, and the crumb was holey, much as a French baguette would be studded with holes. I tried some hummus on one slice, some pimento cheese on another. Both were yummy.

I patted the other three-fourths of the dough into a 9-inch pan, let it rise once, dimpled it with my fingers and poured some olive oil in the holes. I then sprinkled kocher salt and rosemary over the entire surface and baked the foccacia at 500 degrees for 13 minutes. I did not get the oven spring I got with the naan, and I reasoned that was because I let it rise before dimpling it. If I had it to do again, I would bake it after shaping as I did the naan. I am now going to research other recipes for naan and see if they differ from the one in Baking with Julia.

Tuesday, May 15, 2012

TWD -- Pecan Sticky Buns

In short, the Pecan Sticky Buns for our latest Tuesdays with Dorie assignment were good, but not worth the 12-hour effort and the pound of butter it took to make them. After reading through the recipe, I decided at the outset to make only one pan of buns and to turn the other half of the dough into a loaf of brioche. I have always wanted to make brioche, so I'm glad I had this experience, but I doubt if I will repeat it.

I made the mistake of not making the brioche dough the night before baking the buns, so I had to accomplish the task in a day. I started at 9 a.m. and finished at 9 p.m. And, I skipped one step in the lamination process, to save both time and butter.

My KitchenAid was up to the task of mixing the dough for 15 minutes. I did find I had to add a bit more flour, but hestitated adding too much for fear I would throw off the proportions of flour and butter. I was sorely tempted, however, but glad I didn't cave in, for my dough was easy enough to roll after the 4-hour refrigeration. The extra flour would not have been needed.

After letting the dough rise twice (once at room temperature and once in the fridge) I was ready to laminate half of it. The other half was shaped into a bread pan as described in "Baking with Julia" by forming the dough into three balls and placing them side by side in a 9 by 5 bread pan. I let that dough rise at room temperature. The laminated dough went back in the refrigerator for half an hour.

After the 30-minute cold rest, it was ready to roll for the sticky buns. I liked the method of painting the dough with the egg wash. Although I have made sweet rolls all  my adult life, I had never used egg wash using a whole egg. My previous experiences were to either use butter, water or egg white. I used a ground pecan mixture for my nuts, a product I buy in bulk from a Mennonite store in Ohio. I was doubtful if there was enough cinnamon/sugar mixture, but after tasting the buns, I found it to be just right.

After rolling up the dough and slicing it (using the dental floss method by wrapping a length of floss around the dough, then criss-crossing the ends to get a perfect cut, I found I needed to make eight rolls, not seven. If I had cut seven rolls they would have been too tall, especially after the two-hour rise. I found two hours to actually be too much and wished I had let them rise a shorter time period. My rolls were, perhaps, overrisen as they were immense after coming out of the oven.


I first baked the brioche bread, which turned out lovely, then baked the rolls. I put the rolls in a carrying case, then drove them 10 miles north to the bakery where I volunteer. I thought, "Who better to judge the quality of these rolls but my baking companions?" Their verdict? Good, but perhaps not worth all the time and expense. A simpler sweet dough might have been just as tasty with far less time and butter involved. There was one roll left, which I brought home to my husband. He gave it a big thumbs up, even though he is not a sweets lover. He thought the brioche dough resulted in a much more tender and tasty sweet roll than a normal sweet dough would have made. So, perhaps, I will make these again.