Monday, April 14, 2014

TWD -- Can-do Cantuccini

Practically perfect in every way
I loved this recipe. I was thrown at first by the name, but once I read this was real-deal biscotti, I couldn't wait to try it. I have been making biscotti off and on for some time, but had never run into a recipe for unblanched almonds. What were they and where did one get them? I ended up using a product called "raw almonds" so I hoped that meant unblanched.

I followed the recipe exactly and found the end product "practically perfect in every way," as Mary Poppins would say. I have come to believe that a biscotti recipe without any fat makes a cookie too tough and crunchy, but these weren't. My eight-year-old granddaughter even liked them and wasn't put off by the fact that they didn't look like the traditional cookie. I am going on a Cooks' Tour tomorrow and will take these along to pass out on the bus.

Monday, March 3, 2014

TWD -- Buttermilk Scones with two changes

We've all done it, I'm sure. Just
when we're ready to stick something in the oven we remember we forgot a key ingredient. In the case of Marion Cunningham's Buttermilk Scones, this week's Tuesdays with Dorie assignment, it was the sugar. The scones (I chose the pinwheel version) were cut, buttered and ready to pop in the oven when I suddenly remembered the sugar that was supposed to go in with the flour and buttermilk. By then it was too late so I decided to see if the sugar would be missed -- it wasn't. I had sprinkled enough sugar on the completed pinwheels that it made no difference whatsoever that there was none in the dough.

Oops, I forgot the sugar when making the dough
I made one other alteration in the recipe. I substituted self-rising flour for the flour, baking powder and salt called for in the recipe. I like scones with made with self-rising flour, a softer flour that makes for a more tender and less dry scone. After tasting the finished product I was glad I had made the substitution. The scones were wonderful and all but melted in your mouth.

But then I tend to like Marion Cunningham's recipes. As the editor of two revised editions of the Fannie Farmer Cookbook (a mainstay in my kitchen) I have come to trust Marion. And I love to watch her with Julia on You Tube making the recipes in "Baking with Julia." She's so relaxed, poised and elegant that it's hard to believe that she suffered from agoraphobia. When I learned this fact about her by reading her Wikipedia entry it just made me admire her all the more.

Marion suggested several kinds of fruits to put in the pinwheels but I picked something not on the list -- dates. It was an awesome choice and one I will make again. I liked the dough so well in this recipe that I thought it could be used to make quick cinnamon rolls when there is no time for yeast dough to rise. I served my scones with shepherd's pie, another British favorite in our house.

Tuesday, February 4, 2014

TWD: Onion Bialys: How do they eat them in New York?

I couldn't wait to try the Onion Bialys for this week's Tuesday with Dorie assignment. I love bagels -- love to make them, love to eat them. But bialys were uncharted territory for me. I had never heard of them, so consequently had never eaten one. For the correct pronunciation, I consulted the The Free Dictionary on the internet and learned the i was pronounced like an e.  I liked the fact that were from Poland and, according to the book, they were popular at New York brunches. When you live in a town the size of a postage stamp, eating brunch in New York seems so "Sex in City."  And that onion topping with poppy seeds looked awfully yummy in the pictures.

I wondered, "Would they taste like bagels without the water bath?" I was eager to find out. If these could taste as good as bagels, eliminating the water bath would save a step.


First batch -- too fat and with not enough of an indentation
I made mine in two batches. I believed I was following the directions in the book for batch No. 1, but my first half dozen obviously didn't look like the pictures. They were way too fat and the indentation in the middle was not nearly big enough. That's when I found Bill Dube. After Googling "how to shape bialys," I happened on Dube's You Tube video where he shows not only how to shape the dough (he uses the bottom of a water glass to make the indentation) but how to make the dough in a bread machine. I liked Dube's affable presentation so well, I watched a few of his other videos and decided he would make a great next-door neighbor. We could swap bread stories to a fare-three-well and sample each other's experiments.

Bath No.2
Thanks to Bill's help, my second batch turned out looking much more like the ones in the book. I couldn't wait to eat one.
I waited until they were relatively cool before slicing the first one. To my dismay, the filling spilled out of the indentation during the slicing process. This was a puzzler. Did people at New York brunches eat the entire roll without slicing? I couldn't picture people all over New York slicing into bialys and watching the topping fall out on the white tablecloth. The dough seemed too chewy and bagel-like to attempt eating one whole. After mulling this conundrum over, I decided to spoon out the filling, put it in a cup while I sliced the bialy horizontally, toast the two halves and then reapply the topping over the buttered halves. It was delicious fixed this way. My goal now is to finagle a trip to New York, find a brunch spot that serves bialys and watch how the natives eat them.


Tuesday, January 14, 2014

TWD -- Country Bread: good but not great

Joe Ortiz' Country Bread, this week's assignment for Tuesdays with Dorie, was good, but not great. This is the kind of bread I love to make -- a mixture of wheat, whole wheat and rye flours with little or no sugar and oil -- a true artisan bread.

Baskets from Discount Drug Mart
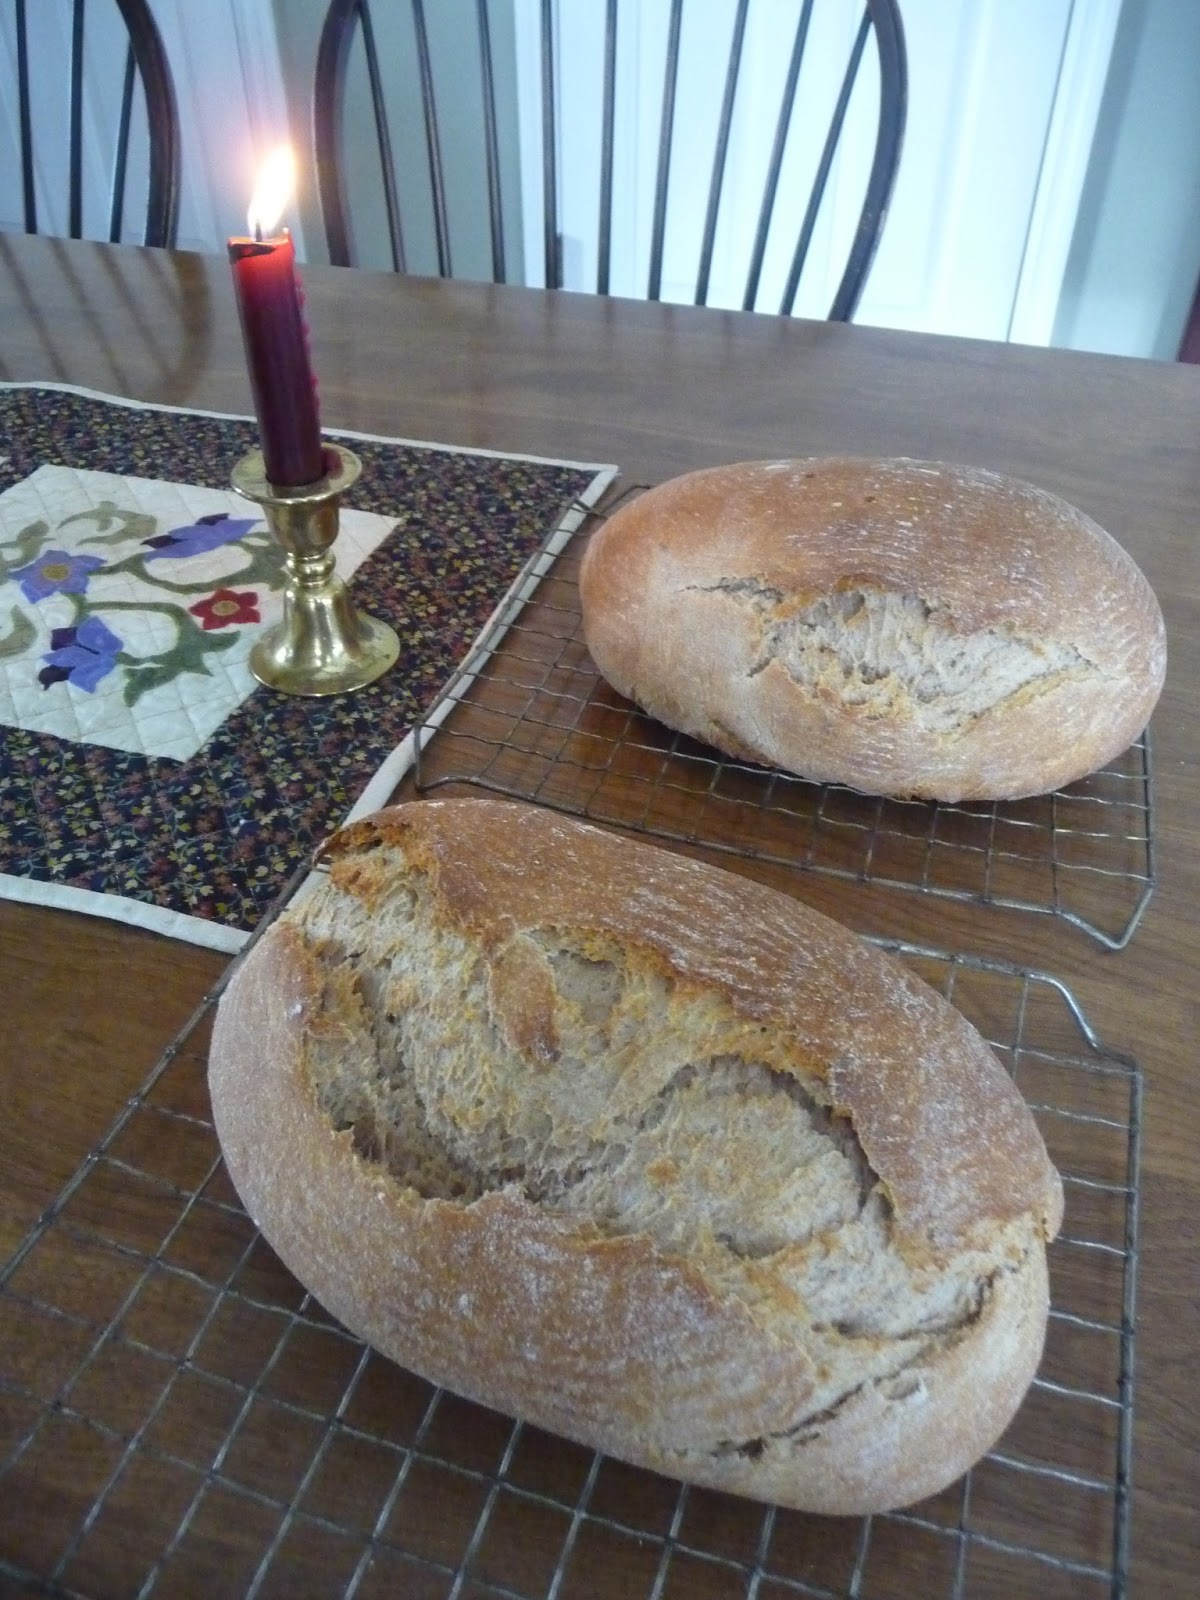
I chose to divide my dough in half and make two loaves, not one, using baskets from our drug store (when you live in a small town you buy everything from window shades to lettuce at Discount Drug Mart.) I bought two wicker baskets there years ago and they are the perfect size to make 1 12-2- pound loaves of bread. I let the dough rise in the baskets seam side up, turn them out on a pizza paddle covered with cornmeal and slide them onto baking tiles.

I had three problems with Country Bread. The first was the yeast. I bake with instant yeast and the recipe called for active dry yeast. I know to use less instant yeast than a recipe for active dry yeast calls for, so I allowed for that fact. What I didn't allow for was the difference in rising times. My dough rose faster than the recipe indicated and I think my loaves were actually over-risen when I slid them in the oven.

My second problem was the amount of water. I thought my dough didn't have enough. Somewhere in the Baking with Julia book, it indicates a cup of flour used in the recipes should weigh 5 ounces. Using this as my guide, I used the minimum amount of flour called for (a total of 30 ounces) and used the 20 ounces of water indicated. That equates to a 66 percentage of four/water ratio. I normally like my bread with a 68 percent ratio and was tempted to add more water to get there, but decided to follow the recipe instead just to see what would happen.

My last problem I believe is the fault of the recipe. I view the baking temperature to be too low for this kind of bread. I normally start an artisan loaf at 460 degrees, then reduce the heat (only if it's browning to fast) after about 10 or 15 minutes. At 425 degrees, my loaves didn't brown that nicely.

When I cut into one of the loaves, I saw that the crumb was too tight and too dry -- an indication that more water was needed and that the dough had over-risen and had somewhat collapsed in the oven. Should I make this loaf again I would add more water, shorten my rising time on the second rise and jack up the oven temperature to at least 450 degrees.

The finished product


For those who love to make this kind of bread, I recommend two books: "The Bread Bible." by Rose Levy Beranbaum and "Bread" by Jeffery Hamelman.

Tuesday, December 17, 2013

TWD -- Gingersnaps that lacked snap

Beauty is their own excuse for being
I was really looking forward to this Tuesdays with Dorie assignment. Gingersnaps are just about my favorite cookie. But when I looked over the recipe I was dubious. There didn't seem to be enough ingredients -- particularly flour -- for the amount of cookies specified.

So, I decided to double the recipe, which was a smart move. If I hadn't, I wouldn't have had enough cookies to make it worth the effort of mixing, rolling, baking and decorating.

Even though the ingredient list looked quite different from my traditional gingersnap recipe, I decided to soldier on and try the Baking with Julia recipe. Plus, my daughter had just loaned me her snowflake cookie cutter and I was dying to try decorating with some meringue powder icing.

I'll have to say I was disappointed in the results. The cookies had snap on the edges, but the centers were chewy, not snappy. I did have fun with my attempt at decorating the snowflakes, but from here on out I will use another recipe for the cookies.

Tuesday, November 19, 2013

TWD -- A high maintenance cookie


Double chocolate cookies -- too thin for my taste.
Was it worth one pound of chocolate, a hard-to-work-with fudge like dough that refused to drop neatly from a cookie scoop and a cookie which stubbornly stuck to the cookie sheet? I vote no. The cookies were good but not THAT good. This cookie was high maintenance.

This cookie also required more time to make than, say, a typical chocolate chip cookie. I have recipes for chocolate cookies made with cocoa that I would rate higher than this one.

I rarely have cookies stick these days now that we have silicone and parchment paper. I first tried baking them on a silicone mat and they wanted to adhere to the silicone. I then tried parchment paper, as specified in the recipe, but with no better luck. And, the cookies tended to spread too much for my taste. I like a thicker, more substantial cookie.

The bottom line is that I won't make these cookies again -- too expensive, too hard to work with and too thin. Give me Martha Stewart's chocolate cookies any day.

Tuesday, November 5, 2013

TWD -- A great chance to experiment

Nine cups of flour for two loaves of bread? That was the first thing that struck me when I read through this week's Tuesdays with Dorie recipe: Pumpernickel Bread. I found the list of ingredients (chocolate, espresso, molasses, yogurt) intriguing, but the amount of flour indicated that if this recipe was made into two loaves they would be HUGE!! With only two people in my household, I decided that loaves that big would get stale long before they were eaten. Thus, I decided to make three loaves, not two, and give one to friends and freeze one for later.

That decided, I then realized this was a chance to experiment with three different baking techniques and see which one proved to be the best. I would shape all three as described in the recipe (I also watched the video which helped in the shaping) but would bake one in a stone covered baking pan (similar to a La Cloche, but long and narrow), bake one in a traditional 9 by 5 bread pan (I chose stone for this as well) and bake the third in the manner described in the recipe, directly on baking tiles using ice water to create steam. I was dying to try the kitchen towel sling for rising, so the third loaf would be treated exactly like the recipe specified.

I also decided to experiment with the rising instructions. Recipes of old called for three rises, but most modern ones require only two. Was the third rise really necessary? I decided to find out. Thus, the first two loaves were allowed to rise twice, and the third would rise three times, just as the recipe prescribed.

Unable to find prune lekvar in my area, I substituted seedless blackberry jam for the prune butter. I was fortunate to have stone-ground rye flour, purchased on a recent trip to Bear's Mill (bearsmill.com) in western Ohio. It's one of the few mills left in the state still grinding flour.  Aside from the lekvar substitution, I followed the recipe to a T. I soon learned that my Kitchen Aid mixer could not handle dough with nine cups of flour. The dough began crawling up the dough hook and beyond! This resulted in a major cleaning effort to coax the dough out of the mixing mechanism. Lesson learned: never try to mix three loaves of bread at once. I ended up taking the dough out of the mixer and finishing it by hand -- not the Herculean task as described in the recipe, but rather soul-satisfying after 10 minutes cleaning my Kitchen Aid of mud-colored globules of dough.

Loaves No. 1 and 2 in the oven
But once past that snag, I was off and running. Loaves one and two were shaped with one placed in the stone covered baker, the other positioned in the 9 by 5 loaf pan. I topped one with sesame seeds, the other with caraway seeds.

The towel technique
I then started work on loaf No. 3 -- the one by which I followed the recipe exactly (except of course for the blackberry jam). I let the loaf rise twice, then shaped it according to instructions.  I floured a kitchen dish towel and placed the loaf seam side up on the towel. I disliked the idea of poking a hole in the towel, as suggested, but discovered that the towel I chose had a piece of binding tape sewn diagonally across one of the top corners -- a device intended for hanging. Perfect. I shoved one end of the towel through the binding tape, then used the tape to hang the loaf from the knob on a kitchen cupboard.

After the requisite 40 minutes of rising, I turned the loaf onto a paddle sprinkled with cornmeal. I egg-washed the top, sprinkled on some seeds, slashed it and positioned it onto preheated baking tiles. I then threw in the ice water for steam and set the timer.

It turned out that I loved the kitchen towel-rising technique. It allowed me to achieve a fat boule without having the sides sag. I will definitely use this technique in the future. It was easy, foolproof and resulted in just the size loaf I wanted.

From left, stone covered baker, 9 by 5 bread pan, towel-rising loaf

So, which loaf tasted the best? I can honestly say I couldn't tell a difference. The mixture of ingredients was wonderful. The crispiest crust, however, was accomplished with the 9 by 5 pan, something I never would have predicted. The shape I liked the best was the one created by the kitchen towel. The least successful was the loaf made in the (expensive) covered stone baker. So, if anyone out there is contemplating purchasing such an item, I would advise against it. I have not found that it's worth the money. A kitchen towel is much, much cheaper.


Tuesday, October 15, 2013

TWD -- Danish, well worth the effort!

Were all the laborious steps required to make this week's Tuesdays with Dorie assignment, Danish, worth the effort? Yes! The end result was delicious. Things got off to a bad start, however.

Boiled-over berries
I chose to use the berry filling, mainly because we grow blueberries and raspberries in our backyard, and we had bags of both in the freezer. I followed the directions in the recipe, using the microwave to boil the berries and sugar. Things were fine after the first 10 minutes. But during the second cooking required, I opened the microwave door to a mess of boiled-over berries.
After scraping the mixture back into the bowl, I proceeded to make the cream mixture, but this time avoiding the microwave and thickening the ingredients on top of the stove.  No problems there. I chose to use half-and-half rather than heavy cream. I next moved on to the dough, using the food processor as suggested.

Putting the berry filling down the middle
After refrigerating the dough for a day, I then attempted the rolling and folding technique. Here was where I had a question. Since the recipe called for half the dough, did the measurements for rolling and folding apply to the whole batch of dough, not just the half? I reasoned that it did, so I made my dough measurements smaller than the instructions stated.

Browning after 15 minutes at 400 degrees
After rolling the dough for the final time after the 30-minute refrigeration, the rest of the Danish was fun and easy. I used all the berries and all the cream and folded the angled ends over the dough with wild abandon. I was nearing the end!! I then applied the egg wash, sprinkled on the almonds, then applied a second coating of egg wash. I picked this tip up at the bakery where I volunteer. If a bread calls for nuts or seeds, we egg wash twice, once before applying the topping, then afterward. That way the topping is sure to stick. I also had some sparkling sugar that I applied with a rather liberal hand.

I thought the baking temperature seemed high, 400, but I baked the Danish at that temp for 15 minutes. By then is was really beginning to brown.

A chose to take my Danish to the bakery, so my fellow volunteers could try it. They all loved it. It was a big hit! I knew I couldn't go wrong with a Beatrice Okajankas recipe. I own two of her books and use one of them almost every week. Thank you Beatrice for a wonderful recipe!


Tuesday, September 17, 2013

TWD -- Expresso Profiteroles without the Profiteroles

Espresso Profiteroles without the Profiteroles
After reading the recipe for the Espresso Profiteroles for this week's Baking with Julia assignment, I decided to do two-thirds of the recipe and leave off the cream puffs. I had been wanting to try custard-based ice cream in my new Cuisinart ice cream maker, and the chocolate sauce sounded good after reading the ingredient list. I couldn't picture my husband and I eating all those profiteroles, but I could see us devouring the ice cream and chocolate sauce.

I doubled the ice cream recipe and I'm glad I did. Otherwise, I would have had way too much sauce. I thought the ice cream was wonderful, although I'll admit I upped the sugar a little bit. Unfortunately, we can't buy vanilla beans in our small town, so I made do by putting two teaspoons of vanilla ice cream in the mix. I wish I had added more.

The sauce was good but grainy. I'm not sure what I did wrong. Once it had cooled, I tried reheating it in the microwave, but found this method unsatisfactory. My best results were when I reheated the mixture in a double boiler. I would make the ice cream again, but I'm not sure about the sauce.

Monday, August 19, 2013

Johnny Cake Cobbler: Green around the gills

Green goo in amongst the cobbler
We've all heard of green eggs and ham. But a green around the gills fruit cobbler? I don't think so. I will be curious to see if other Tuesdays with Dorie bakers saw their Johnny Cake Cobbler turn green shortly after it was out of the oven.

That's not to say it wasn't good. It was. At least the first day. When it was first removed from the oven (I chose to make it in a 10-inch deep dish pie plate), it looked fine.  As it sat on the counter, however, it began to turn green. I thus
Just out of the oven, before the green set in
I decided to shove the leftovers in the refrigerator, hoping to keep the greenish color at bay. But, after refrigeration and even after warming in the microwave, it wasn't as good the second day. I've decided it's best eaten the day it's made. And I would hesitate serving it to guests. I think the greenish color would turn off just about everyone.

My guess is that the plums are the culprit. I have used nectarines before in desserts and never found they turned the end results green. So I'm blaming the plums. I'm curious to see if anyone else had this experience. Would I make this again? No. My favorite cobbler, bar none, is the peach cobbler I once had at a potluck and later found on Allrecipes.com. It's called Peach Cobbler 1.It's made with white bread rather than a biscuit-like dough. This cobbler is to die for.

Monday, August 5, 2013

TWD -- Loved the sauce, disliked the crust

I was curious to try Eastern Mediterranean Pizza since I love to experiment with different crust recipes. Since this was a pita bread used as a crust, I wondered how I would like it. In short, I didn't. I like my pizza crusts to be snappier, to brown better (sugar helps here) and to be less chewy. My favorite crust is by Rose Levy Beranbaum from her book "The Bread Bible."

Dough after additional flour added
I made a half-crust recipe as suggested, but found I needed the maximum amount of flour, and then some. Even then, the dough was a bit wet.

Because of the sponge and the long rise, the dough was rather difficult to roll/stretch out. It kept bouncing back. Part of my problem could have been the fact that I used bread flour instead of the all-purpose flour as suggested. I was out of AP flour and didn't want to run to the store to get more. Therefore, the bread flour, I'm sure, made for a chewier crust.

That said, I loved the topping. We grow our own Roma tomatoes, and it was nice to find a recipe that has one use the tomatoes as is, without breaking them down in a long-simmering sauce. The combination of lamb, tomatoes, shallots, garlic, cinnamon and allspice was wonderful. I wouldn't have changed a thing. Incidentally, I used twice the amount of sauce called for in the recipe. I could tell by reading the ingredient list that this would be a bit skimpy for eight individual pizzas.
Mediterranean pizza after baking

If I do this again, I would use Rose's recipe for a crust and double the sauce ingredients as described above.

Tuesday, July 16, 2013

TWD -- A Half-sized Tart

A half-sized tart made with a pastry crust
What do you do when a recipe calls for phyllo dough and there is none to be had in the small town in which you live? Substitute. So my Summer Vegetable Tart was made with pastry dough, a supply of which I always keep in my freezer. And a 9" tart seemed awfully big for two people when the recipe appears to be one that needs to be eaten soon after it was made, not days later in the form of leftovers.

So I opted for a 7" tart instead and by cutting the recipe in half, everything worked out just fine. I followed the recipe exactly, but added a bit more thyme. I figured the small amount called for in the recipe once cut in half would be minuscule.

I started by blind-baking my crust, using dried beans as my pie weights. I keep a parcel of dried beans wrapped in foil on my baking shelf and use the same dried beans every time I need to blind bake.
Pie crust pricked with a fork
Using dried beans as pie weights
After letting the crust cool, I sauteed the vegetables, added the goat cheese and scooped the mixture into the cooled crust. I let the mixture cool to room temperature, then cut the tart into wedges and tried it -- delicious. I will definitely make this again, but experiment
with other vegetables. Like everyone else in my area of Ohio, I have a wealth of zucchini right now. I think I will cut back a little on the red pepper, keep the mushrooms and onion and add a handful of sliced zucchini.

Tuesday, June 18, 2013

TWD -- Galette: a wonderful invention


Swiss cheese, cheddar cheese and basil
This week's assignment for Baking with Julia, the tomato galette, was a joy to make and to eat. I do recall we made a galette last year and I remembered the dough was easy to make and to roll out. This time I used the food processor and made half a recipe. The dough appeared a little too wet in the beginning, so I added some additional flour.

Ready to pop in the oven
After letting the dough chill, I rolled it out using a pasty cloth and rolling pin cover. Oh, if all dough was so easy to roll!! I then transferred the rolled-out circle to a piece of parchment paper and began putting on the toppings. I used cheddar and swiss cheeses because that's what I had and I thought the combination would be good. We grow our own basil, so I snipped off a few leaves and tossed them with the cheeses.

The baked tomato galette
After applying the cheese/basil mixture, I lapped the Roma tomatoes in a circular shape as instructed, brought up the edges and pleated them, sprinkled on some Penzey's Tuscan Sunset herb mixture and popped it into the over for about 25 minutes. The taste was heavenly, and I will make this again before the summer is over. Our tomato season doesn't really hit here in Ohio for about a month, so I will be ready to go when the time is right.

Tuesday, May 21, 2013

TWD -- Brioche pockets to die for

Baked pockets ready to eat
I have a confession to make. I didn't use the brioche recipe in Baking with Julia. It looked like a heap of dough, so I debated cutting the recipe in half or consulting "Bernard Clayton's New Complete Book of Breads." If you are a break-baking enthusiast, this book is a bible and one that should be on your shelf. Clayton has a food processor brioche recipe that makes about half as much brioche as the Baking with Julia formula and is easy as pie to make.

1/4 cup warm water
1 package dry yeast
1 1/4 cups flour
3 tablespoons sugar
1/2 tsp salt
2 large eggs, room temperature
6 tablespoons butter, melted. 
Proof the yeast in the water. Put everything in the food processor with the steel blade except the eggs and butter. Pulse a couple of times to aerate. Drop in first the eggs and process about 5 seconds. Then pour the melted butter through the feed tube in a steady stream. Process 20 seconds. The dough is sticky, like batter, but that's OK. Scape dough in a buttered bowl and let rise about 3 hours. Then refrigerate.


From here on out, I followed the Baking with Julia recipe. I found the dough easy to work with and used a hamburger press to cut my rounds.

Brioche before seeding and baking

I stretched the top rounds a bit before placing them over the filling. The edges were easy to turn over and crimp. I did use the full filling recipe and if I had not, the pockets would have been scantily filled.

My version made eight pockets -- perfect for a back yard drinks party. Everyone loved the combination of the brioche dough, the caramelized onions, the potatoes, goat cheese and asparagus. I will definitely make this recipe again!

Tuesday, May 7, 2013

TWD -- Delicious but ungainly

The rhubarb upside down cake assignment for Tuesdays with Dorie couldn't have come at a better time for this Ohioan. Our rhubarb patch is at its peak, so there was no problem getting enough of the stuff for the upside down cake.

I debated whether to make this recipe using the baby cake pans, which my daughter kindly gave me for Christmas. However, I had four pans and the recipe called for eight cakes. The other option was to use the 12-inch skillet, which I happen to have and rarely use.

The recipe went together without a hitch. But getting the cake turned upside down using a 12-inch skillet was a feat that could only be accomplished with an assistant. Luckily, my husband was handy, and he helped me turn the ungainly pan upside down. However, with all our careful planning, the cake missed the mark by a couple of inches and some of the dessert was hanging over the edge of the plate and dangerously close to breaking off. By jerry-rigging a device using a spatula and two dough scrapers, I was able to prop up the cake until it cooled and I could gingerly shove it over until it rested securely on the cake plate. This took several attempts before I could manipulate the ungainly cake into a secure position.

The finished product after jerry-rigging and much manipulation
I will take this treat to the bakery where I volunteer and we'll serve it during our coffee break tomorrow. I must confess I snitched a wee bit of the cake and topping and it was delicious, perhaps the best yellow cake I have ever made. This will now be my go-to recipe for yellow cake, but when doing the upside down cake again, I would cut the recipe down by one-third and use a nine-inch skillet which would make it much, much easier to turn. Most of my recipes for pineapple upside down cake call for a nine or 10-inch skillet.

Tuesday, April 16, 2013

TWD -- Call me deviant

I confess. I deviated from the recipe for madeleines that was in Baking with Julia. When I saw that Baking with Julia was having us use the genoise recipe, I was suspicious. Although I would consider a madeleine a type of genoise, it is more than that. In my mind, a madeleine should have some baking powder (although I've read there is some disagreement about this), but should definitely have more butter. Three tablespoons of butter can nowhere be enough, when most recipes for 24 madeleines call for a stick and a half, or at the very least nine tablespoons. And, where was the flavor? I remember the genoise recipe as being bland, bland, bland. I wanted my madeleines to have a little kick to them.

So I began cross-referencing. I hauled down "Joy of Cooking" from the bookshelf. I consulted the book "Sweet Life in Paris." I looked at recipes on the internet, particularly Allrecipes.com, where I could look at user reviews.

Although the Baking with Julia recipe seemed to have odd proportions, it also had a major and unforgiveable error in my opinion. The recipe called for 1 cup of confectioner's sugar, yet nowhere did it say where or how the sugar was to be used. Where was the proofreader?! Where was the editor?! If the sugar was to be used as a dusting for the madeleines after they were baked, why one cup? It wouldn't take a cup of the stuff to dust 24 three-inch cookies. By this time I was quite distrustful of the printed recipe and decided to veer off in my own direction.

The madeleines before glazing
Thus, I combined the most popular recipe on Allrecipes.com (which incidentally used confectioner's sugar right in the mix) and the recipe from "The Sweet Life in Paris." The latter recipe called for the grated rind of a lemon, plus a lemon glaze. My combined recipes used a stick of butter for 19 cookies.

Ready to head out the door to the bakery
I was pleased with the results, and so were the volunteers at the bakery where I work who shared the end result. They loved the lemon flavor and thought the shape of the cookies were a joy. I then took a plate to two art teachers with whom I sew, and they liked them. And, one had a wonderful suggestion that I will use next time that I make these cookies. I will use a lavender glaze on them rather than a lemony one. Such a glaze can be made by steeping a little lavender in some hot water, then adding that to the confectioner's sugar. I use this glaze for a lavender pound cake that I make and it's nothing short of wonderful.

Monday, April 1, 2013

TWD-Potato bread made the hard way

Rustic Potato Bread ready to slice
The Rustic Potato Bread assignment came at a perfect time for me. I had just made my usual potato rolls for an Easter dinner using King Arthur's potato flour. These rolls are a standard, as is a white sandwich bread made with potato flour that I make when grandchildren are coming. Would Rustic Potato Bread made with actual potatoes be better and give off more of a potato flavor? I was curious to find out.

I decided to make my bread using two-thirds whole wheat flour and one-third white all-purpose flour. The mixing process was interesting to say the least. The dough appeared so dry at the beginning I was sorely tempted to add a lot of water to keep my Kitchen Aid mixer from having a heart attack. I resisted in adding a lot of water but did dribble in a few extra drops to help things along. I reasoned whole wheat flour might absorb more water than white flour. The dough seemed to come together and was cleaning the sides of the bowl, but after about eight minutes, it began to come apart, leaving small globules of dough on the side of the bowl. I decided to call the kneading process to a halt and gently hand-kneaded the dough until it felt right.

Rising in the baskets
I was a bit put off by the shaping technique of putting the seam of the bread right-side up. I had read in the comment section that one baker experienced an unraveling of sorts when the bread was baked, so I opted to let my loaves rise in baskets (obtained from my local drug store where I buy just about everything including most of our food because our town has no local supermarket).
Ready to go into the oven
The baskets allowed the loaves to rise with some support and when I turned them out on a cornmeal-dusted pizza paddle, they looked pretty good. Should I score them? There was nothing in the instructions that indicated scoring, so I didn't. I wish now that I had. The loaves burst open in places, which definitely gave them the rustic look.

Now, for the taste test. Were these loaves better than the bread and rolls I traditionally make with the addition of potato flour? Not really. Are loaves using potato flour easier and quicker to make? Yes, yes, yes. There is no cooking of the potato, no allowing the potatoes to cool and most of all, no anxious moments standing over the Kitchen Aid worrying that it might die. And did I mention that my husband had to hit the bowl with a mallet to get it to loosen from its base?

So, I will probably go back to my traditional method of making potato bread but I'm thankful for the experience of trying the real deal.

Tuesday, March 12, 2013

TWD -- Cookies that get raves!

I will be traveling during the normal time to bake the latest assignment for Tuesdays with Dorie, so I chose to make the mocha chocolate chip cookies 10 days ahead of schedule. I'm glad I did. That way I could offer the cookies to several people and get their reactions. In short, they got raves!

I used espresso powder which I had recently purchased from Jungle Jim's, the largest food market in the United States. The market is located in Hamilton County near Cincinnati, and for anyone living in the Midwest, I highly recommend a stop there. I never would have found espresso powder in my small town, but luckily I purchased a container at Jungle Jim's even before I knew I would need it for a Baking with Julia assignment.

When making these cookies again, I would alter the recipe slightly. I would up the amount of flour by one-fourth of a cup and I would substitute shortening for the butter. I know. I know. I can read the minds of all the butter aficionados out there who shudder at the thought of substituting shortening for butter. But, by using shortening, the cookies won't spread out as much. I, in fact, used half butter and half shortening when making the mocha cookies and now wish I had used all shortening. I like a chocolate chip cookie that you can really sink your teeth into -- think Otis Spunkmeyer. My favorite recipe uses two and a fourth cups of flour for the same amount of fat.

My cookies were made with two tablespoons of espresso powder, but next time I will up that to three tablespoons to get even a stronger mocha taste.

Would I make these cookies again? Yes, definitely, but with the aforementioned adjustments. In short, I would use the recipe on the box of Arm & Hammer baking soda with addition of three tablespoons of espresso powder. And I would bake them at 375 degrees for 11 minutes.


Tuesday, February 19, 2013

TWD -- Boca Negra, heaven on a plate!

A 6-inch cake slice using half the recipe
Oh my! How can anything so relatively easy to make be so delicious?  I think Boca Negra is my favorite recipe to date from the Baking with Julia cookbook.

I chose to use only half the recipe and bake the cake in a 6-inch pan since there are just two of us in our household. This worked great. And, bittersweet chocolate isn't available in our small town, so I substituted Baker's Unsweetened Chocolate. No problem.

I first made the white chocolate cream using the food processor. It took less than five minutes to accomplish, and I let this sit in the refrigerator over night.

The next day I mixed up the cake ingredients using the food processor. Again, this took all of about five minutes to accomplish. I wondered if the small amount of hot liquid comprised of bourbon and sugar would be enough to melt all that chocolate. No problem. The food processor accomplished this task without a problem. I then added the butter, eggs and flour and poured the mixture into a greased 6-inch cake pan, putting waxed paper on the bottom and greasing that with butter. Would this mixture stick without flouring the pan? I confess I worried about this during the 30 mintues the cake was baking. But, no problem. The cake easily slid out of the pan after running a knife around the edge. I then flipped it over onto a serving dish and let it cool about 20 minutes.

Then I cut into the cake, adding a generous dollop of the white chocoate cream. Heaven. I will make this dish again and again, particularly when we are entertaining. I shared some of the cake with friends and they loved it as well. This recipe will be hard to top!

Tuesday, February 5, 2013

TWD -- January is Focaccia Month

The Baking with Julia Focaccia
January was my month for making focaccia. I am a volunteer at a bakery which supports a national Roman Catholic Shrine in Carey, OH. All proceeds from the bakery go toward the upkeep of the bascillica. During the month of January we made large batches of focacccia on two separate occasions. So, when I saw the Feb. 5 assignment with Baking with Julia was foccacia, I made mine on Jan. 30, making it Focaccia Month for me.

Interestingly enough, neither the bakery's method nor the Baking with Julia technique were what I normally do when left to my own devices. My favorite way to make focaccia is using Jeffery Hamelman's recipe in the book "Bread." His method uses a poolish and the resulting dough is very wet, similar to a ciabatta dough. I love the results using this method and often make this focaccia when asked to bring something for a potluck.

The bakery's method is to take our wildly popular pizza dough, let it rise once, pat it into full-sized bakery sheets using five pounds of dough per sheet, letting it rise again, then dimpling the dough with our fingers. We next slowly pour olive oil over the dough, then add rosemary, kosher salt, black pepper and garlic powder. The resulting product is probably an 1 1/2-2 inches in thickness.


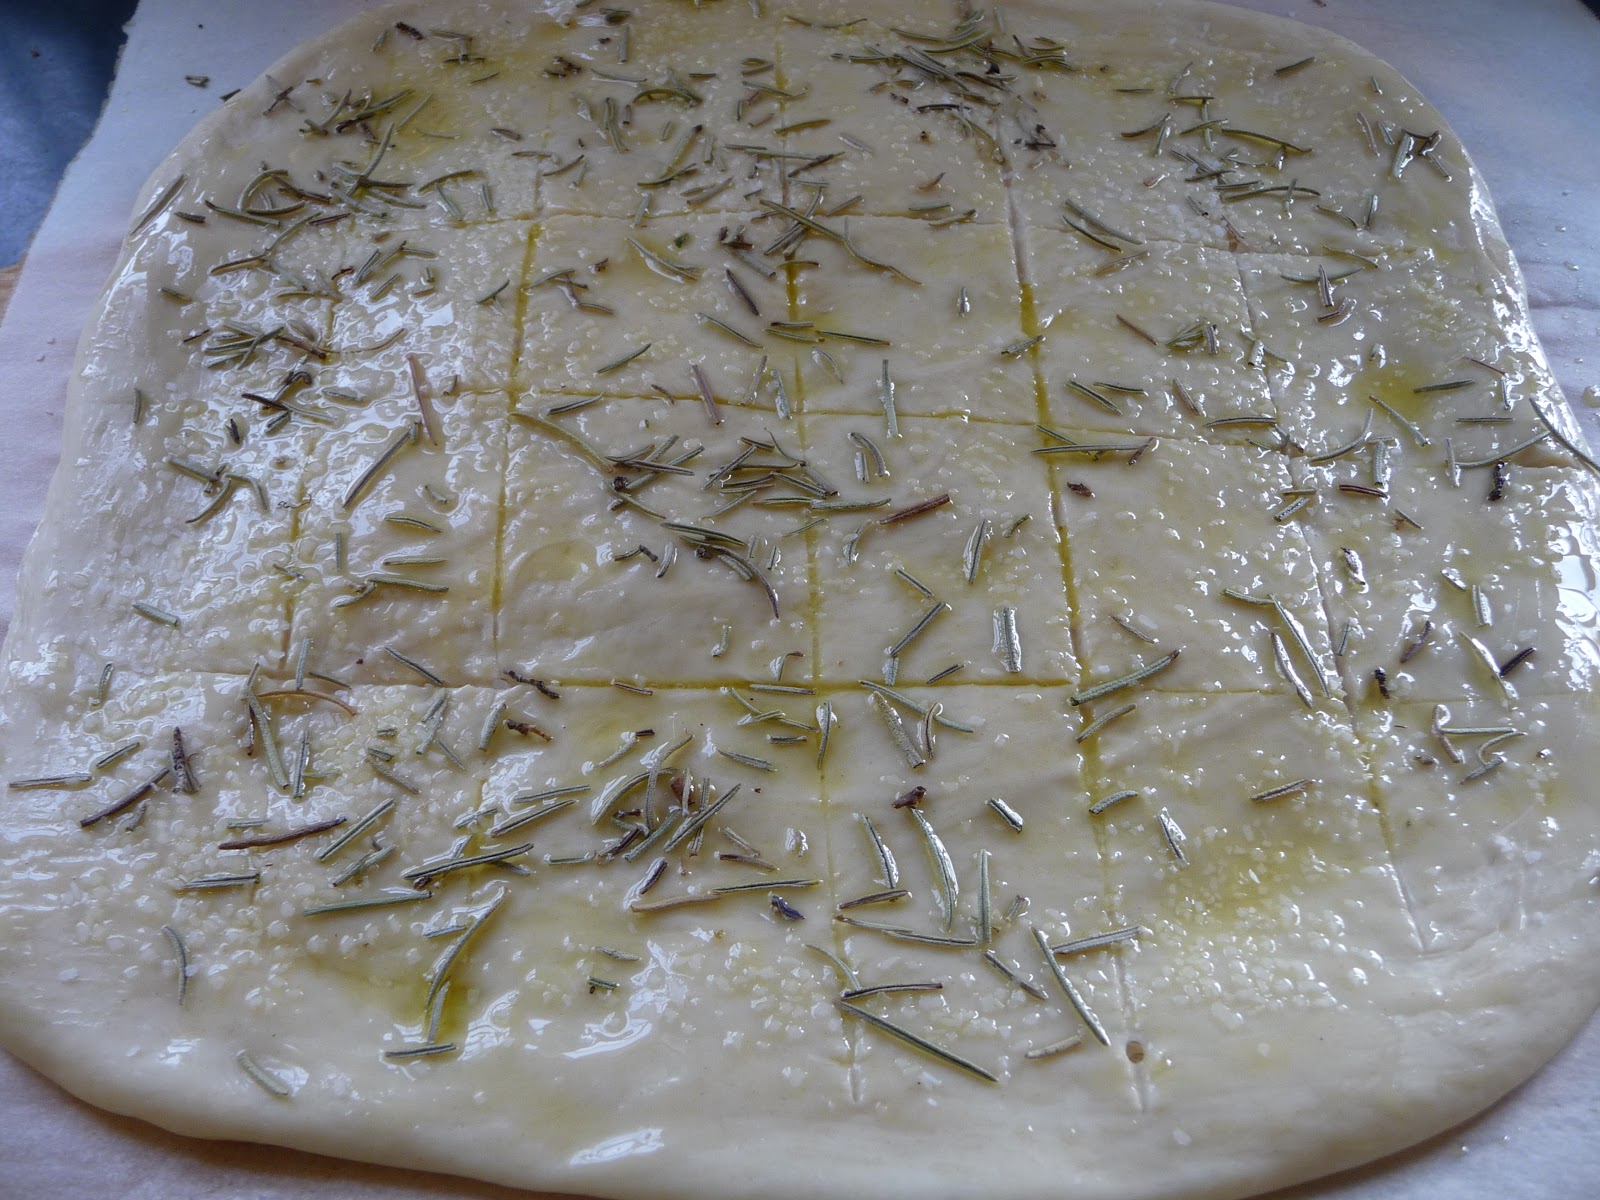
Dough after slashing but before baking
The Baking with Julia recipe was intriguing because of the refrigeration step. I was curious to see if it did result in large holes as advertised. It did; now I'm wondering how. Would the holes have been even bigger had I let the dough rise a second time? I'd be curious to try this recipe again and use a second rise.

A portabella sandwich on focaccia
I thought slashing the dough in a tic-tac-toe design interesting, as I usually think of focaccia with dimpled dough. I was pleased with the results, but next time will make it a little thicker. I like focaccia for sandwiches, and this was a little short to slice in half.